GitHub Release Management
Streamlining Your Development Workflow
PaidCommunities offers GitHub integration to automate your release process, creating a seamless connection between your development workflow and product distribution. By connecting your repository, you can push a tag to GitHub and have a release automatically prepared in PaidCommunities.
Integration Overview
The Automated Release Process
- Developer Action: Push a new tag to your GitHub repository
- GitHub Communication: GitHub sends webhook data to PaidCommunities
- File Retrieval: PaidCommunities downloads your release files
- Release Creation: A new "pending" release is created in your dashboard
- Review Notification: You receive an email notification to review and confirm
- Final Approval: You verify the release and make it available to customers
- Reduced Manual Work: Eliminate uploading zip files for each release
- Version Consistency: Ensure your GitHub and PaidCommunities versions always match
- Streamlined Workflow: Maintain your existing Git-based development process
- Review Control: Still approve each release before it reaches customers
Setting Up GitHub Integration
1. Generate Your PaidCommunities GitHub Secret
Navigate to Developers > GitHub in your PaidCommunities dashboard and click + Add Secret.
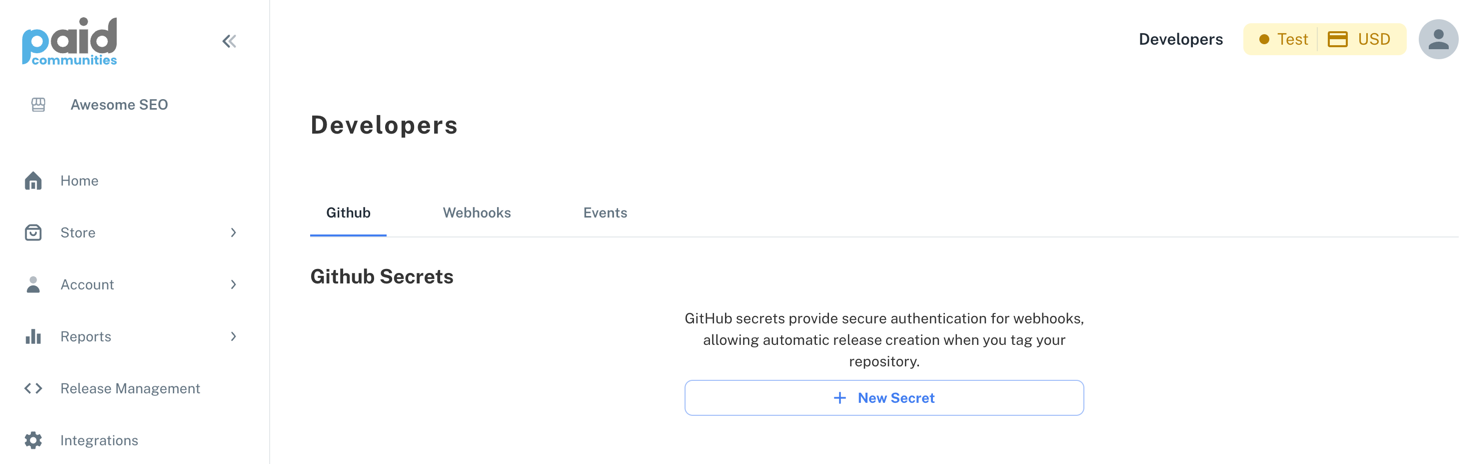
You'll need to provide:
- Secret Name: A descriptive name for this integration
- GitHub Token: Your GitHub personal access token
- Product: Select which product this secret is for
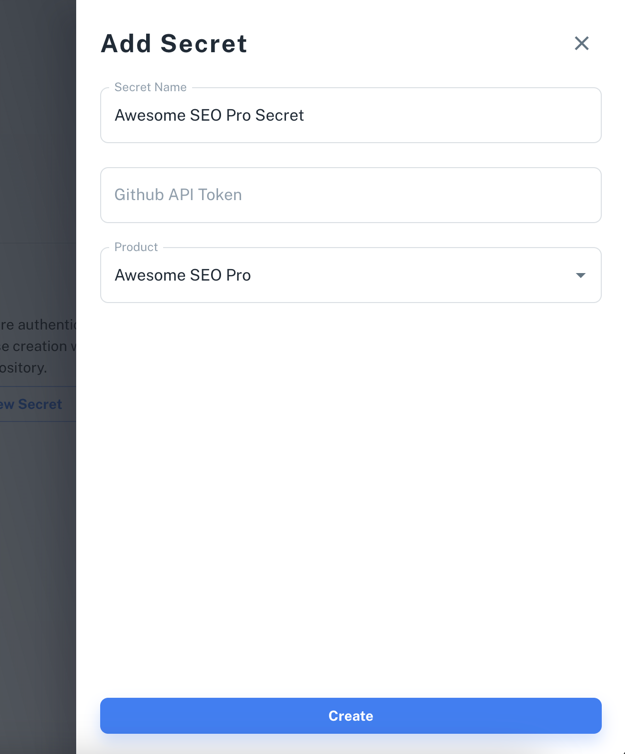
To create a GitHub personal access token:
- Go to GitHub.com → Settings → Developer settings → Personal access tokens
- Choose either a classic token or a fine-grained token
- Ensure the token has permissions to read your repository
For detailed instructions, see the GitHub Token Guide.
After creating the secret, it will appear in the GitHub secrets table. Reveal the secret and payload URL which you'll need for the next step.

2. Set Up the GitHub Webhook
In your GitHub repository:
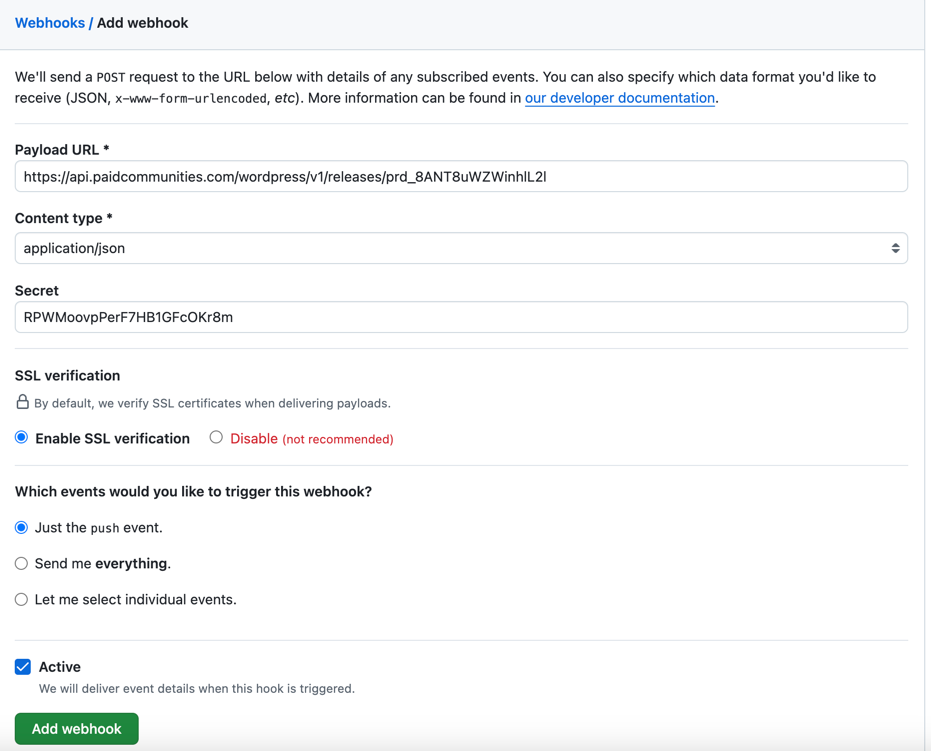
- Go to Settings > Webhooks > Add webhook
- Configure the webhook with these exact settings:
- Payload URL: Copy from your PaidCommunities dashboard
- Content Type:
application/json - Secret: Copy from your PaidCommunities dashboard
- Events: Select "Just the push event"
- Click "Add webhook" to save
3. Test Your Integration
Verify that everything is working correctly:
- Create and push a new tag to your repository:
git tag v1.0.0
git push origin v1.0.0
- Wait for the webhook to trigger (usually within seconds)
- Check your PaidCommunities dashboard under Release Management
- You should see a new pending release created automatically
- Review the release details and click "Release" when ready
Best Practices for GitHub-Based Releases
- Use Semantic Versioning: Follow the v1.2.3 format for clear version identification
- Include Detailed Release Notes: Write comprehensive notes in your GitHub release
- Verify Built Files: Ensure your repository contains built/compiled files if needed
- Tag from Release Branches: Create tags from stable branches, not directly from main/master
- Automate Testing: Implement CI/CD tests before creating releases
Troubleshooting
If your GitHub integration isn't working correctly:
- Check Webhook Delivery: In GitHub, look at recent webhook deliveries and their status
- Verify Token Permissions: Ensure your GitHub token has the correct repository access
- Confirm Repository Structure: Your repository must contain a valid WordPress plugin or theme
- Review Error Messages: Check both GitHub webhook responses and PaidCommunities notifications
Need additional help? Visit our GitHub Integration Troubleshooting Guide or contact support.